
We discovered recently that a beautiful avenue of old beech trees quite near where we live are due to be thinned out. The trees are known as "The Dark Hedges". A trust has been set up to help with the work and plant new ones to eventually replace the old ones as they grow too old and eventually have to be removed.
Here's a photo of them I took today before the thinning takes place.
The Trust has distributed a leaflet about their aims. Here are some extracts from it....
-------------------------------------------------------------------------------
This avenue of mature beech trees was planted in 1750. Don’t you think it is worth preserving?
The "Dark Hedges Preservation Trust" has been set up by local landowners, a local councillor, a tree specialist and other interested members of the public. A Bank Account has been opened in the Northern Bank Ballymoney.
AIM: To preserve the avenue of trees known as The Dark Hedges situated on the Bregagh Road near Stranocum.
Road Services have informed the local landowners that 26 of the trees must be removed as they are a danger to passing traffic. The 3 local farmers have agreed to foot the bill for this work to be carried out and have contacted a local tree specialist to carry out the work.
However we feel very strongly we would be doing this local community a great dis-service if this was not followed up by a re-planting programme to replace not only the trees that must come down but also others that have fallen over the last 200 years. This will be a major undertaking but we feel it is in the best interest of this community where The Dark Hedges is not only a tourist attraction but also a venue for wedding photographs and others and indeed has been called a Photographer's Paradise. The Dark Hedges features in many Tourist Board Booklets and is in this year's Belfast Telegraph Calendar amongst others. The Dark Hedges provides a wonderful habitat for birds and other wildlife.
To this end we appeal to local businesses and individuals for assistance with funding. It is estimated it will take up to £32 000 to carry out the re-planting of some 210 half -standard 5-7 year old Beech trees and our tree specialist has agreed to maintain the trees, free of charge, for five years following this work. He intends to make other features from the remaining stumps- such as carved seats etc and we hope local school children will get involved in the project.
--------------------------------------------------------------------------------------------------------
If you feel you would like to donate to this cause then please contact me and I will send you details about how to go about contributing. I hasten to add I am nothing to do with the Trust but would like to help by furthering their advertising.


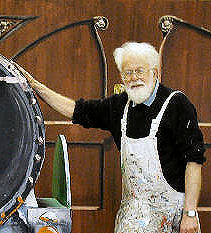
 CURTAINS. Now to paint the curtains.
  Like the doors, I first put on a base coat of the main colour of these drapes. However, unlike the doors, whilst the paint was still wet, I added a darker colour to be the folds. In the background of the above photo I have left a little of the real curtains for you to see the various values of colour. The dark folds are darkest in the depths of the fold and get lighter as they near the outside. I often do this by first dipping a clean wide brush in clean water then dipping the edge of that brush in a dark colour. Now I do a few "practice" strokes on a spare piece of board which evens out the colour so that my brush is loaded with dark colour on one side which gaduates to clear on the other side. I then paint this as the folds. Next, once the folds have been painted, I put in the highlights of a lighter version (a tint) of the base colour. And finally I use a small brush to paint pure white to put in the bright front edges of the folds .
 What also helps to give these curtains the 3d effect are the shadows I painted to help the illusion of panels and walls. Note the shadow on the rail is further out than on the wall. (I think that is the wrong way round! but it works)
